
Administrators | Assessments
Assessment Guidelines
The assessments must be completed in one sitting and in a location with computers and an active, reliable internet connection. If there is an interruption during the assessment due to a computer or internet issue, the test will need to be restarted.
Assessments may be proctored in a district office, human resources department, library, or school computer lab. The assessments may not be taken in a test taker’s home, the teachers’ lounge, or a classroom with students present.
What is a proctor?
A proctor is a person who monitors individuals during an examination. The proctor is present during the entire assessment to ensure assessment guidelines are being followed. Before the proctored session, the proctor must read the guidelines to familiarize themselves with the rules and regulations for the assessment.
An administrator can be designated as a proctor.
Proctoring Guidelines:
- Proctors must be present the entire time the test taker is completing the assessments.
- Possession of or use by the test taker of any notes, calculators, cell phones, tablets, wearable technology, watches, memory sticks, thumb drives, and other electronic recording, listening, scanning, or photographic devices is strictly prohibited. Scratch paper may be provided.
- Accommodations for test takers with a documented disability should be arranged based on the type of accommodation(s) reasonably required by the disability. The proctor must document the accommodation(s) when setting up the proctoring session for that individual. Accommodation does not include assistance in answering the questions.
Before the assessment, administrators should:
- Schedule the appropriate time to administer the test, keeping in mind the following: (1) Assessment 1 includes 30 questions and may require up to 1 hour, and (2) Assessment 2 includes 75 questions and may require up to 3 hours.
- Reserve an appropriate location and ensure that computers with a reliable internet connection are available during the testing. The computer must not be provided by the test taker.
- Communicate the date, time, and location for the assessment to the proctor and let them know the test taker needs to bring a valid photo ID, which may include one of the following: a driver’s license, state-issued photo ID, military ID, or passport.
Adding a Proctor
A proctor must be added to an account before they are able to proctor a test. Due to validity purposes, only a proctor is able to start a test session.
1. From the Dashboard, click the gear icon.

2. Click Manage Users on the left navigation panel.

3. Click +New.

4. A pop-up window will appear. Add the new user’s information and check the Proctor Tests box.

**Proctors need to enter the account or school name as Authorized Organizations in order to see the users. If the test taker is not currently listed in that account, the proctor can provide the code that will be on the Proctoring Dashboard to the test taker to enroll them in the testing session.**
If the proctor is already in the system, ensure that the Proctor Test box is checked.
1. From the Dashboard, click the gear icon.
2. Click Manage Users on the left navigation panel.
3. Click the proctor’s name.
4. Click Edit.

5. A pop-up window will appear with the proctor’s information. If they are solely a proctor (and not an administrator), the only box needing to be checked is Proctor Tests.

Creating a Proctored Session
An administrator can create a proctored session, but they are not able to start a session unless designated as a proctor. Due to validity purposes, only a proctor can start a session.
A proctored session can only be open for a maximum of 24 hours.
1. Click Proctoring Dashboard on the left navigation panel.

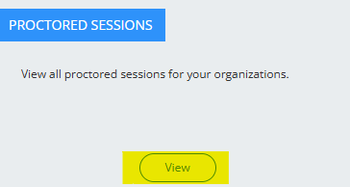
2. Click View under Proctored Sessions.
3. Click +New.
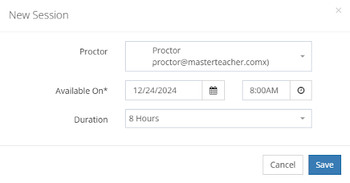
4. A pop-up window will appear. From the drop-down menu, choose the correct proctor and then fill out the remaining areas. Once all information is filled out, click Save, and the session will be created.
- Note: If a user tries to take an assessment outside the parameters of the session date and time, the user will not be allowed to proceed with the assessment.
5. If you need to change the proctor, date of the session, or length of the session, you can edit the pending session by clicking the three dots (...) on the right side of the screen.

6. Only one testing session will need to be created for an individual proctor.
**An administrator is able to create a testing session but is not able to start the session unless designated as a proctor. Due to validity purposes, only a proctor can start a session.
After a test taker completes the assessment(s), the administrator can view the scores, download the final certificate, and resend the certificate if needed.
Final Certificate
For assessments taken before February 6th, 2025, please reach out to our support team to obtain a copy of the final certificate. Support may be reached Monday-Friday, 7 a.m.-6 p.m. CST by contacting support@masterteacher.com, calling 888-233-8469, or via live chat at masterteacher.com.
After test takers complete and pass both assessments, you can view their final scores and download their certificate from the Proctoring Dashboard. The test taker will also see the certificate in their account and receive a copy by email.
1. Navigate to the Proctoring Dashboard.
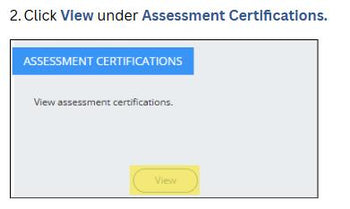
2. Click View under Assessment Certifications.
3. From here, all assessments that have been passed will be visible. Results can be filtered to a specific user by clicking Filter.

- A pop-up window will appear, and you can search by the Assessment, User, or Proctor.

4. You will now see the assessments, the user, the proctor, the certification date, and the final score.
- Once both assessments have been passed, you can download the certificate to save a copy or print for your records.

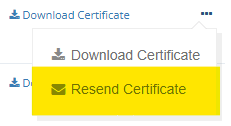
5. From this screen, you can also resend a certificate to the test taker by clicking the three dots (...) on the right side of the screen and clicking Resend Certificate.
6. To view the final scores and score breakdowns of the passed assessments, click Show Scores. Then click the assessment name, and a pop-up window will appear. Click the > arrow to view more detailed information about the assessment. This will show each section of the assessment along with its respective score.

If a user did not pass one or both assessments, you can find their score and breakdown under Reports.
1. From the dashboard, click the house icon in the top navigation pane.
2. Click Reports then Assessment Reports from the menu on the left side of the screen.

3. Click View under Assessment Progress Report.

4. From here, you can search for the individual that tested in the search bar OR by clicking the Filter button.

5. You will see a brief overview of the assessment.

6. Click the assessment title and the > arrow next to the assessment to see a breakdown of the final score.
